DeLorean Radiator Bleeder Kit
Like in many areas, the DeLorean’s cooling system is a little bit different when compared to the average modern car. The coolant radiator is still in the front, but the engine’s mounted in the rear. This not only makes for a very long coolant loop that takes a lot of fluid, but also means the system has multiple high points – meaning you have to bleed the air bubbles out of multiple places. The system wasn’t really designed with ease of maintenance in mind, but thankfully there’s a few upgrades/modifications you can do to make this job easier! So today I’ll be installing one of DeLorean Parts NorthWest’s Wings-B-Cool modifications, a radiator bleeder kit. This procedure can theoretically be done on the car as-is if you’re small & flexible, but I highly recommend jacking up the front right corner & removing the front right wheel to give you plenty of space to work in.

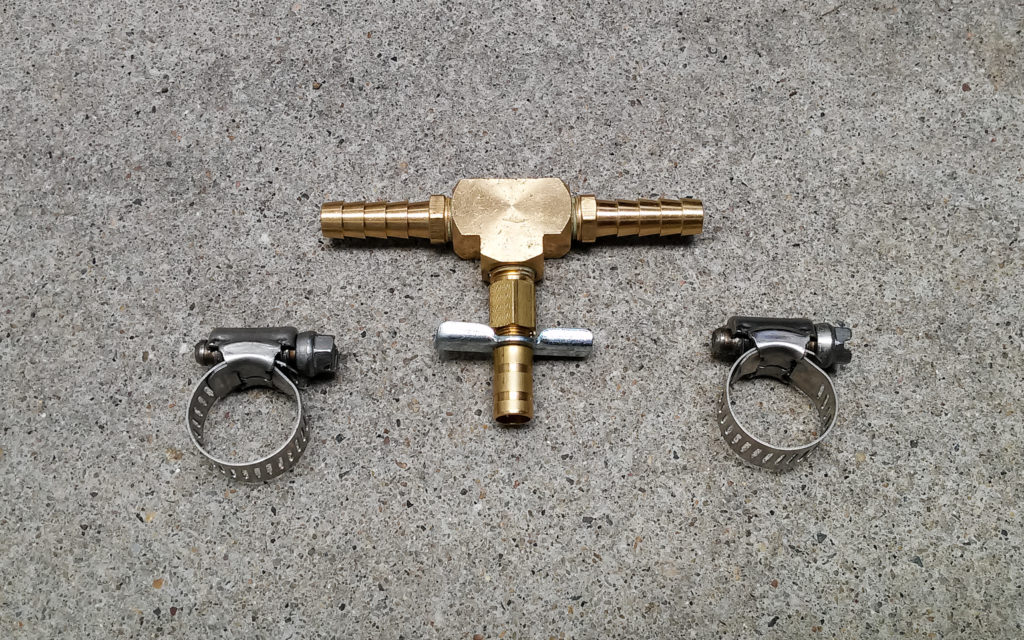
The best hacks are the simplest ones. This mod consists of nothing more than a T-valve, hose clips, and some temporary clear hose only used when bleeding (not pictured)
The normal procedure for bleeding the DeLorean’s radiator involves disconnecting a hose, having boiling hot coolant spray all over you in sputtering bursts between the air bubbles, then reattaching the hose again when you think you’ve got rid of all the bubbles. Even worse, if you have the original radiator, the hose barb is plastic and after 35+ years this plastic is very brittle and likely to crack on you, which means you have to replace the entire radiator. Thankfully I have an upgraded metal radiator, but even still it’s not a pleasant procedure. I did it once and swore that I’d do this modification before I had to change my coolant again.

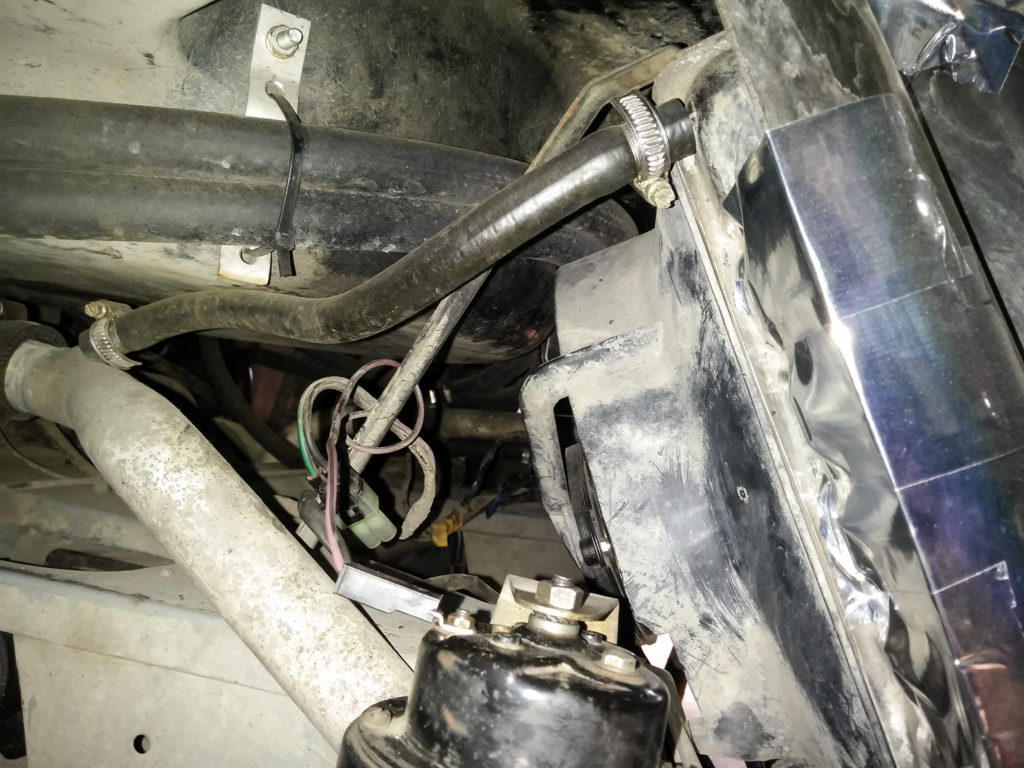
The radiator return connectors – the lower metal pipe is the main coolant return line, while the upper flexible hose is an attempt at a self-bleeding system. It doesn’t really work and you still have to remove this hose to manually bleed the system
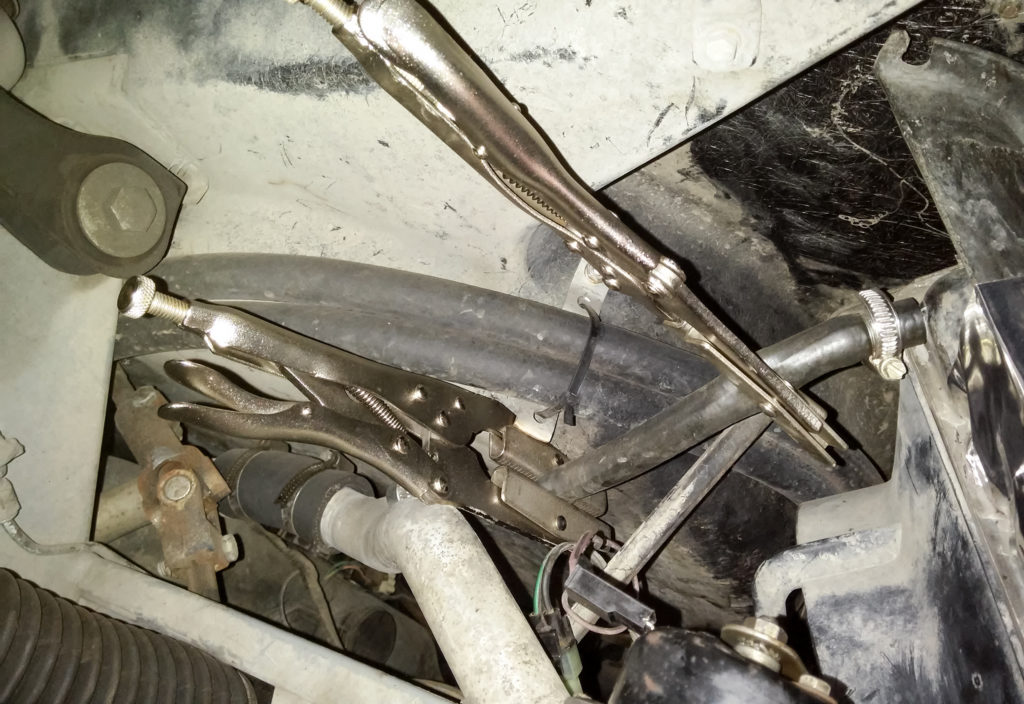
The procedure for this mod is pretty simple – clamp off the hose (or drain your coolant system), cut out a segment of the hose, insert & replace that segment with the kit’s T-valve. I have some clamps specifically designed to close off coolant lines which made this job super simple. I recommend either investing in a pair or borrowing/renting them if you’re planning to do this job without draining the coolant system, because otherwise you’ll end up with coolant everywhere.
Cutting a segment of this hose is probably the most difficult part of this job – and that’s not hard to do at all, which says something about how easy this mod is.
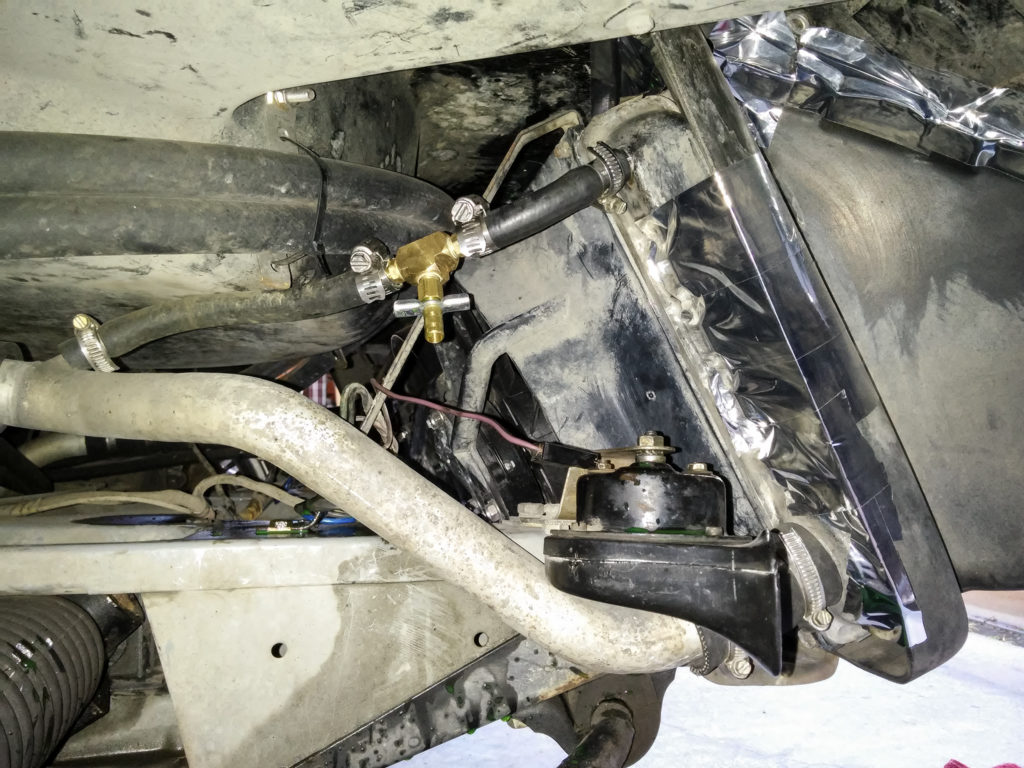
To operate the new coolant radiator bleeder, simply attach a temporary hose to the barb on the T-valve that leads into a suitable container, turn on the car, bring the engine up to operating temperature when the cooling fans cycle, then open the valve. When you no longer see air bubbles in the clear tube, turn off the valve & remove the hose and you’re done – it’s that simple! You might want to do this in multiple goes, topping up the coolant reservoir when necessary to make sure it doesn’t run out – if it gets too low you’ll just introduce more air into the system and then you’ll have to bleed the engine too.
You can also see another mod I recently did to the car on the right of this image – I taped up the gaps between the radiator & its shroud with metal ducting tape (which is a different product to duct tape that is designed to stay stuck at a wide temperature range and also when wet). This means more air goes through the radiator itself instead of going around it through the gaps. I’ve noticed it’s helped my engine stay a little bit cooler, but not by much – I would only recommend it if you have large gaps around your shroud and you also live in a hot climate, but don’t expect it to work any miracles for you. Properly bleeding the radiator will have a larger impact.
Once this radiator bleeder kit was all installed, I bled my radiator with the T-valve just to check it all worked. Interestingly enough, even though I had already bled my system before, I still got a few more air bubbles out of it this time. I guess that goes to show how much more effective this bleeder is vs removing & reattaching the entire hose! I would totally recommend this upgrade to other DeLorean owners, it’s well worth the small price to eliminate a messy job.


There are no comments yet, add one below.
Leave a Reply