DeLorean Voltage Gauge Calibration Checking
While trying once again to make my DeLorean’s voltage gauge more accurate, I decided to just jump to the very end – the actual gauge itself. At this point it’s the most likely component to be dodgy, but the wires leading up to it & the final connections to it could still haven’t been checked & cleaned, so I’ll tackle them too while I’m at it. One thing about DeLoreans, though – the easiest way to remove the dash’s instrument cluster is to just remove the entire binnacle… so that’s exactly what I did!

My DeLorean’s binnacle/dash instrument cluster, hooked up to a power supply & bench multimeter. Time to get serious!
The dash instrument cluster on a DeLorean has a rather old-fashioned flexible plastic circuit board with mechanical connectors. This circuit board is incredibly fragile and should always be handled with great care, as the copper traces are thin & come loose from the plastic very easily. Thankfully mine’s in almost-perfect condition.
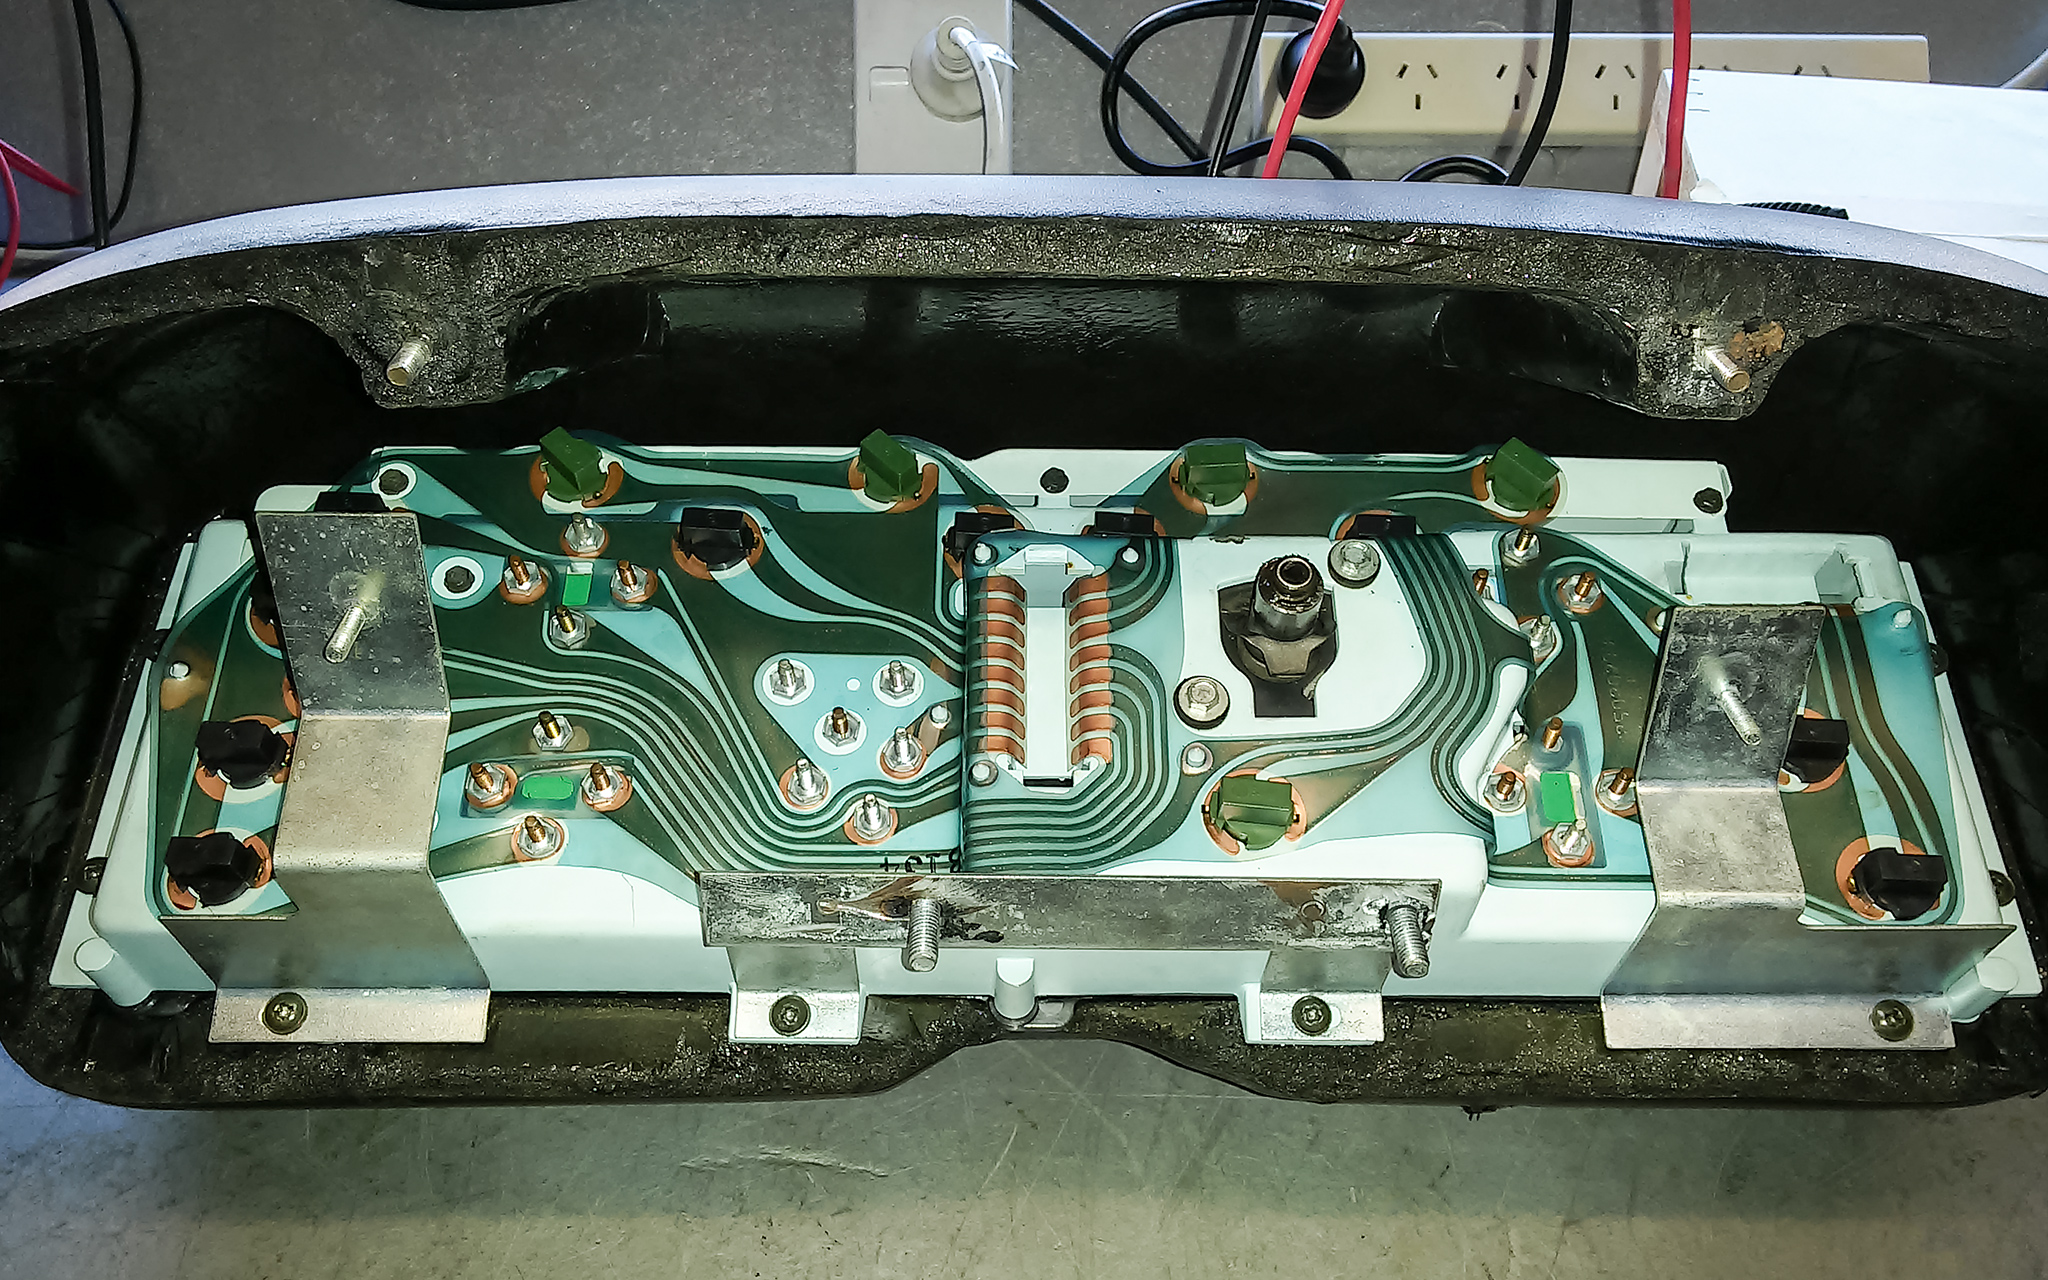
The rear of my DeLorean’s binnacle/dash instrument cluster – the small black/brown rectangular twist sockets hold all the light bulbs, one connector goes in the hole in middle, and the other connector goes in the hole in the top right
I attached the probes from the power supply straight to the threads of the voltage gauge – this bypasses absolutely everything and will give me the purest voltage reading possible. And just to be extra-sure, I didn’t rely on the voltage gauge of the power supply – I used one of the most accurate multimeters I have access to, an EZ Digital DM441B bench multimeter, which was also attached directly to the threads of the voltage gauge. Under these conditions this multimeter claims at least 0.1% accuracy to 4 digits, which should be good enough for around 0.01V. As expected, there was a slight voltage disagreement between the power supply and the multimeter, which is why I set it up this way because you should trust a dedicated multimeter’s reading far more than you trust a power supply.
So I attached everything, turned it all on, set everything to the right levels, aaaaand…. It turns out my voltage meter itself is reading incorrectly! It’s incredibly non-linear too – the amount it’s off by varies up & down over the whole gauge, sometimes off by 0.2V and sometimes off by 4.5V, in a very random up-and-down polynomial curve not a simple offset or gradient. Something way too varied for me to simplify to a thing I could keep in the back of my head – in fact the only consistent thing is that it’s always under by a minimum of at least 0.2V. The good news though is that what the gauge currently displays as around “13.2V” is actually around 14V, so I now know that this is pretty much the sole reason why it’s reading low. I took a whole bunch of photos of the needle at different points for future reference – I won’t bore you by sharing all of them but here’s two showing how much it varies.
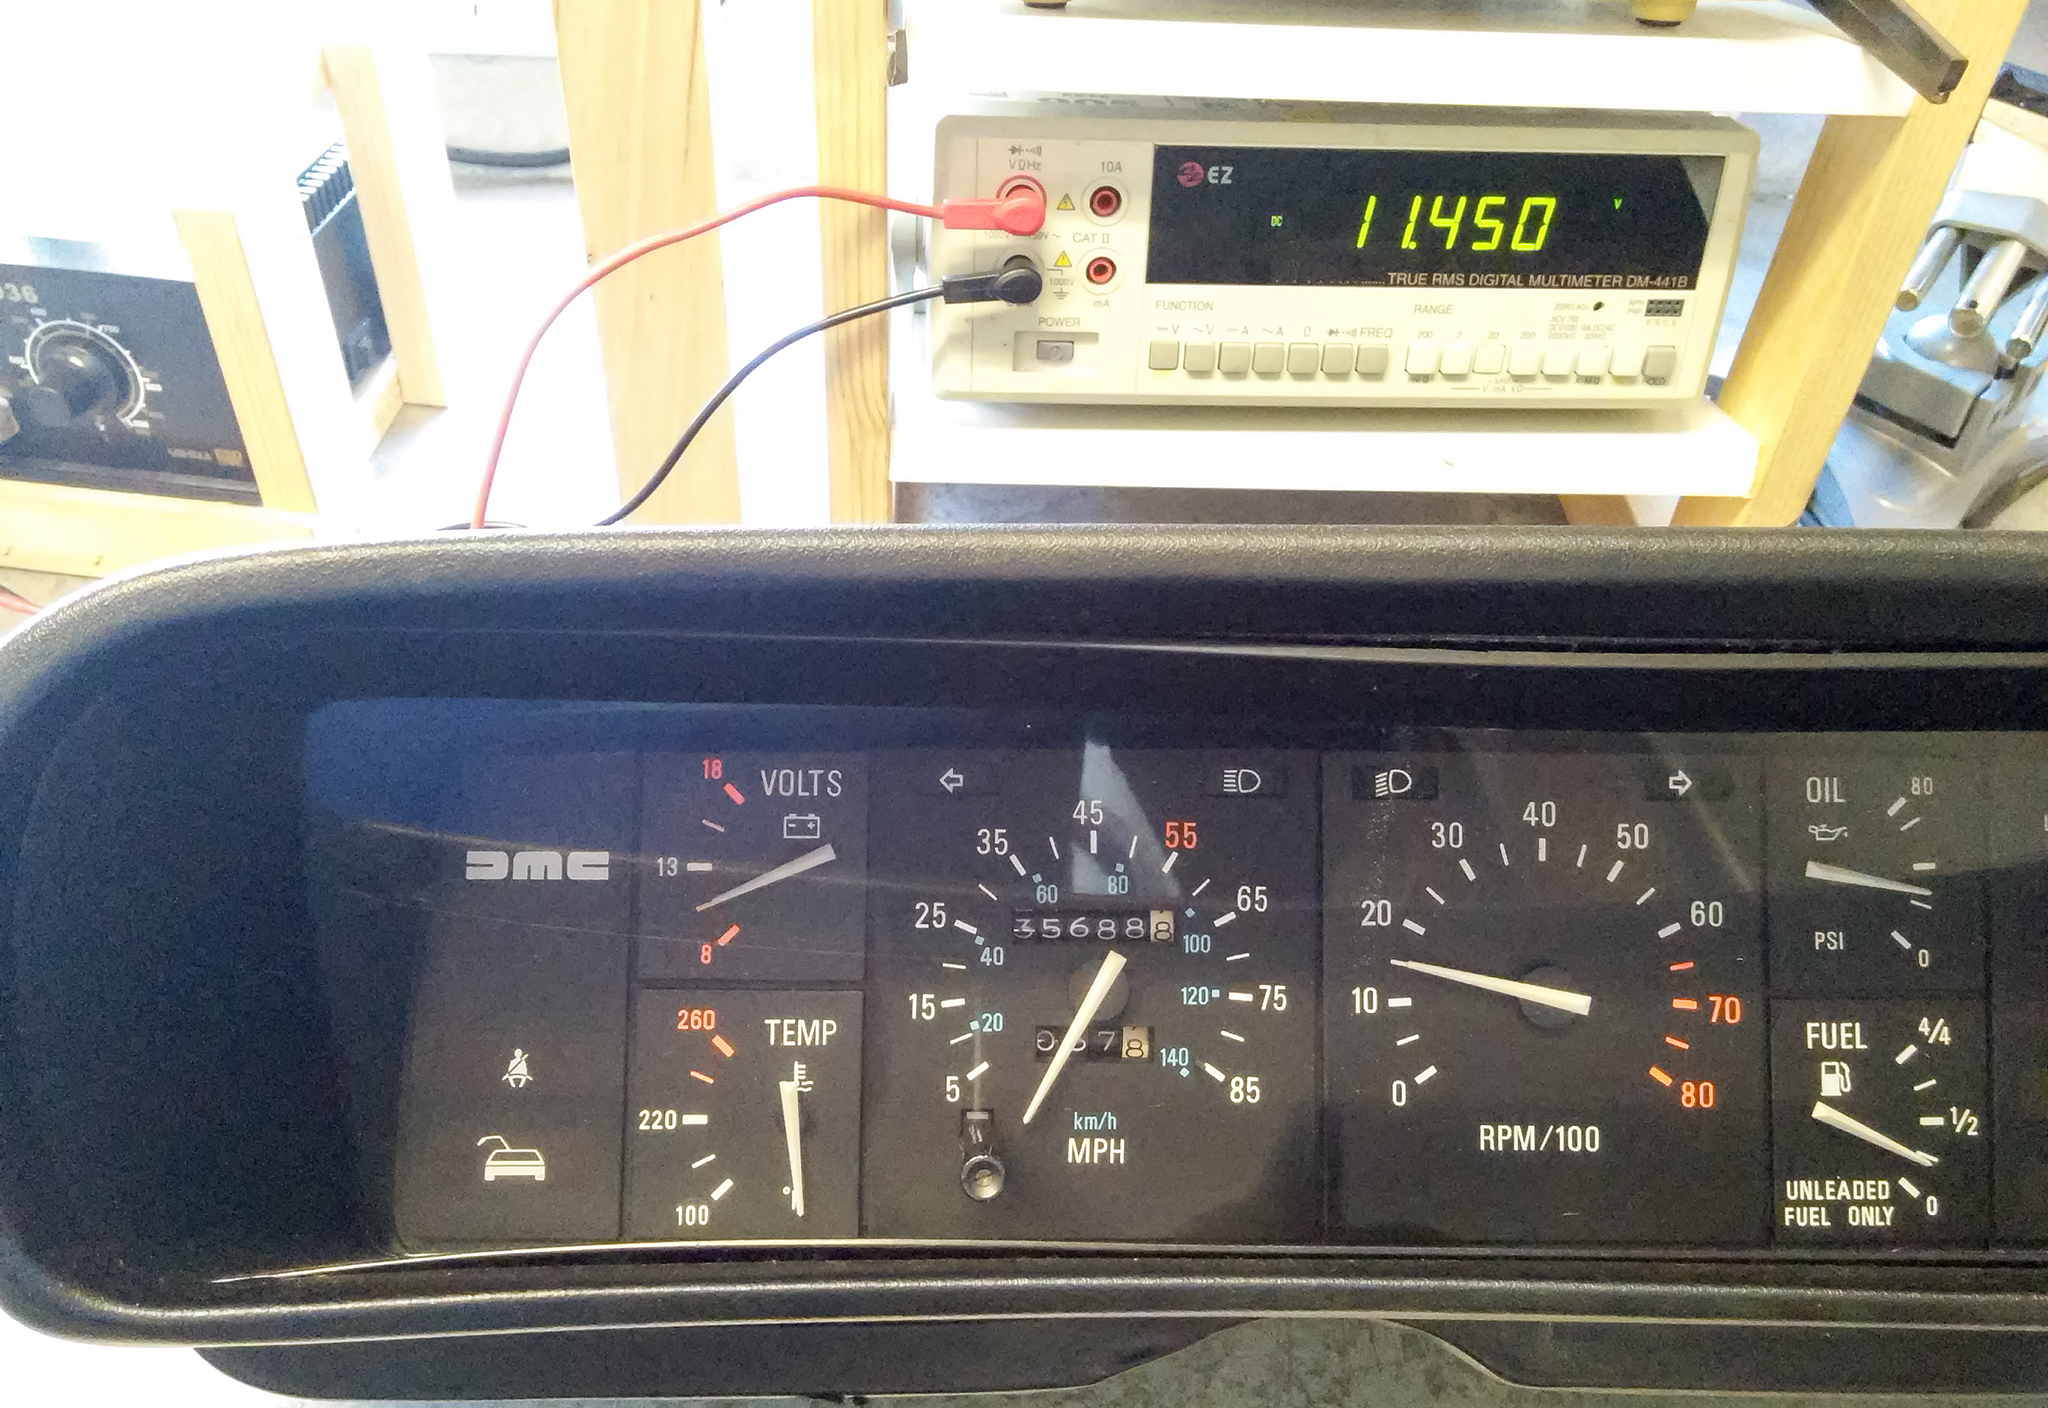
My DeLorean’s voltage gauge’s needle at the 10.5V marker when it actually has 11.45V going into it
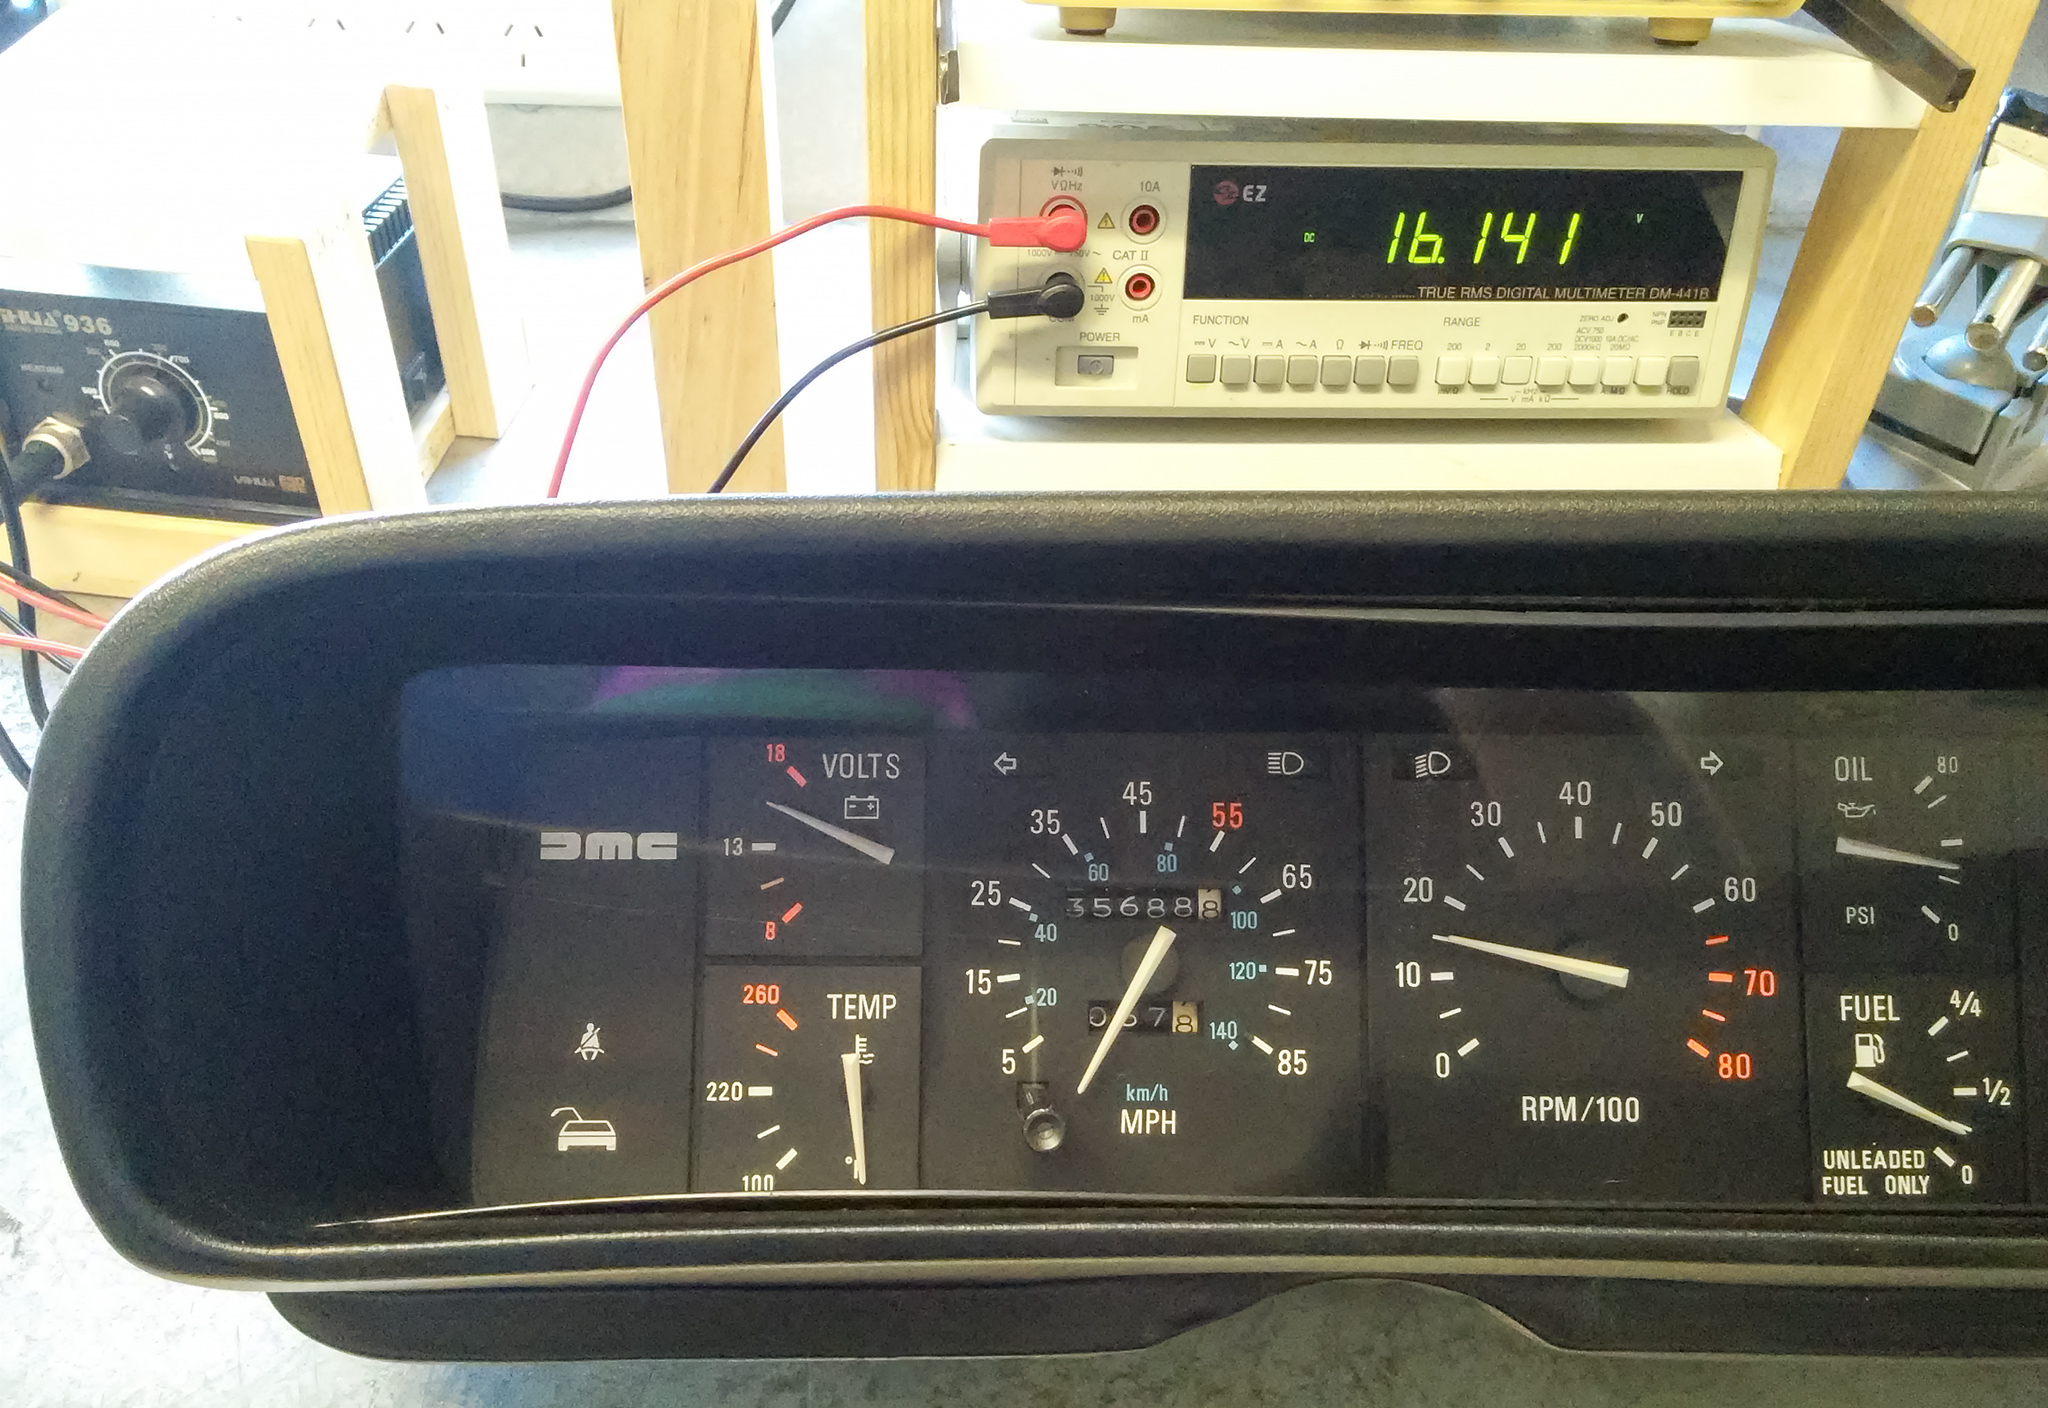
My DeLorean’s voltage gauge needle at the 15.5V marker when it actually has 16.14V going into it
So, where to from here? Well since the error amount varies so much up & down over the gauge’s range, it isn’t really possible to disassemble & recalibrate this part – at least not for this kind of error. The best I could hope for would still give an incorrect reading 90% of the time. DMCh sells New Old Stock Voltage/Temperature Gauges, but there’s a good chance a replacement would also have calibration problems in a similar-but-different way, and I’m not sure this is worth $200AUD for that slight chance of improvement. So, I think I’ll just have to live with it.
While I was in there, I gave all the connections a solid clean with Deoxit electrical contact cleaner & also repaired a bad contact in the Lambda counter socket. This boosted the voltage gauge another tiny bit, now to around 13.4V, which I know represents around 14.2V. I also made sure all the main connector pins are sticking out far enough, since one or two of them had started to retreat.
Speaking of, if anyone happens to know what these connectors are and where you can buy more… People are pretty sure they’re not DeLorean-specific, but as far as I’m aware no one in the DeLorean community has been able to 100% positively identify them over the past 40 years. In fact this is one of the few parts people have tried to 3D print to replace because it’s so unique/complicated and you really can’t make do without it. So there’s a challenge to you, dear readers! UPDATE: check the comments to this post, since I first wrote this years ago some helpful people have left some sources that look like they’ll do the trick!

The main central connector to the back of the DeLorean dash instrument cluster, before I fixed the two semi-dodgy pins
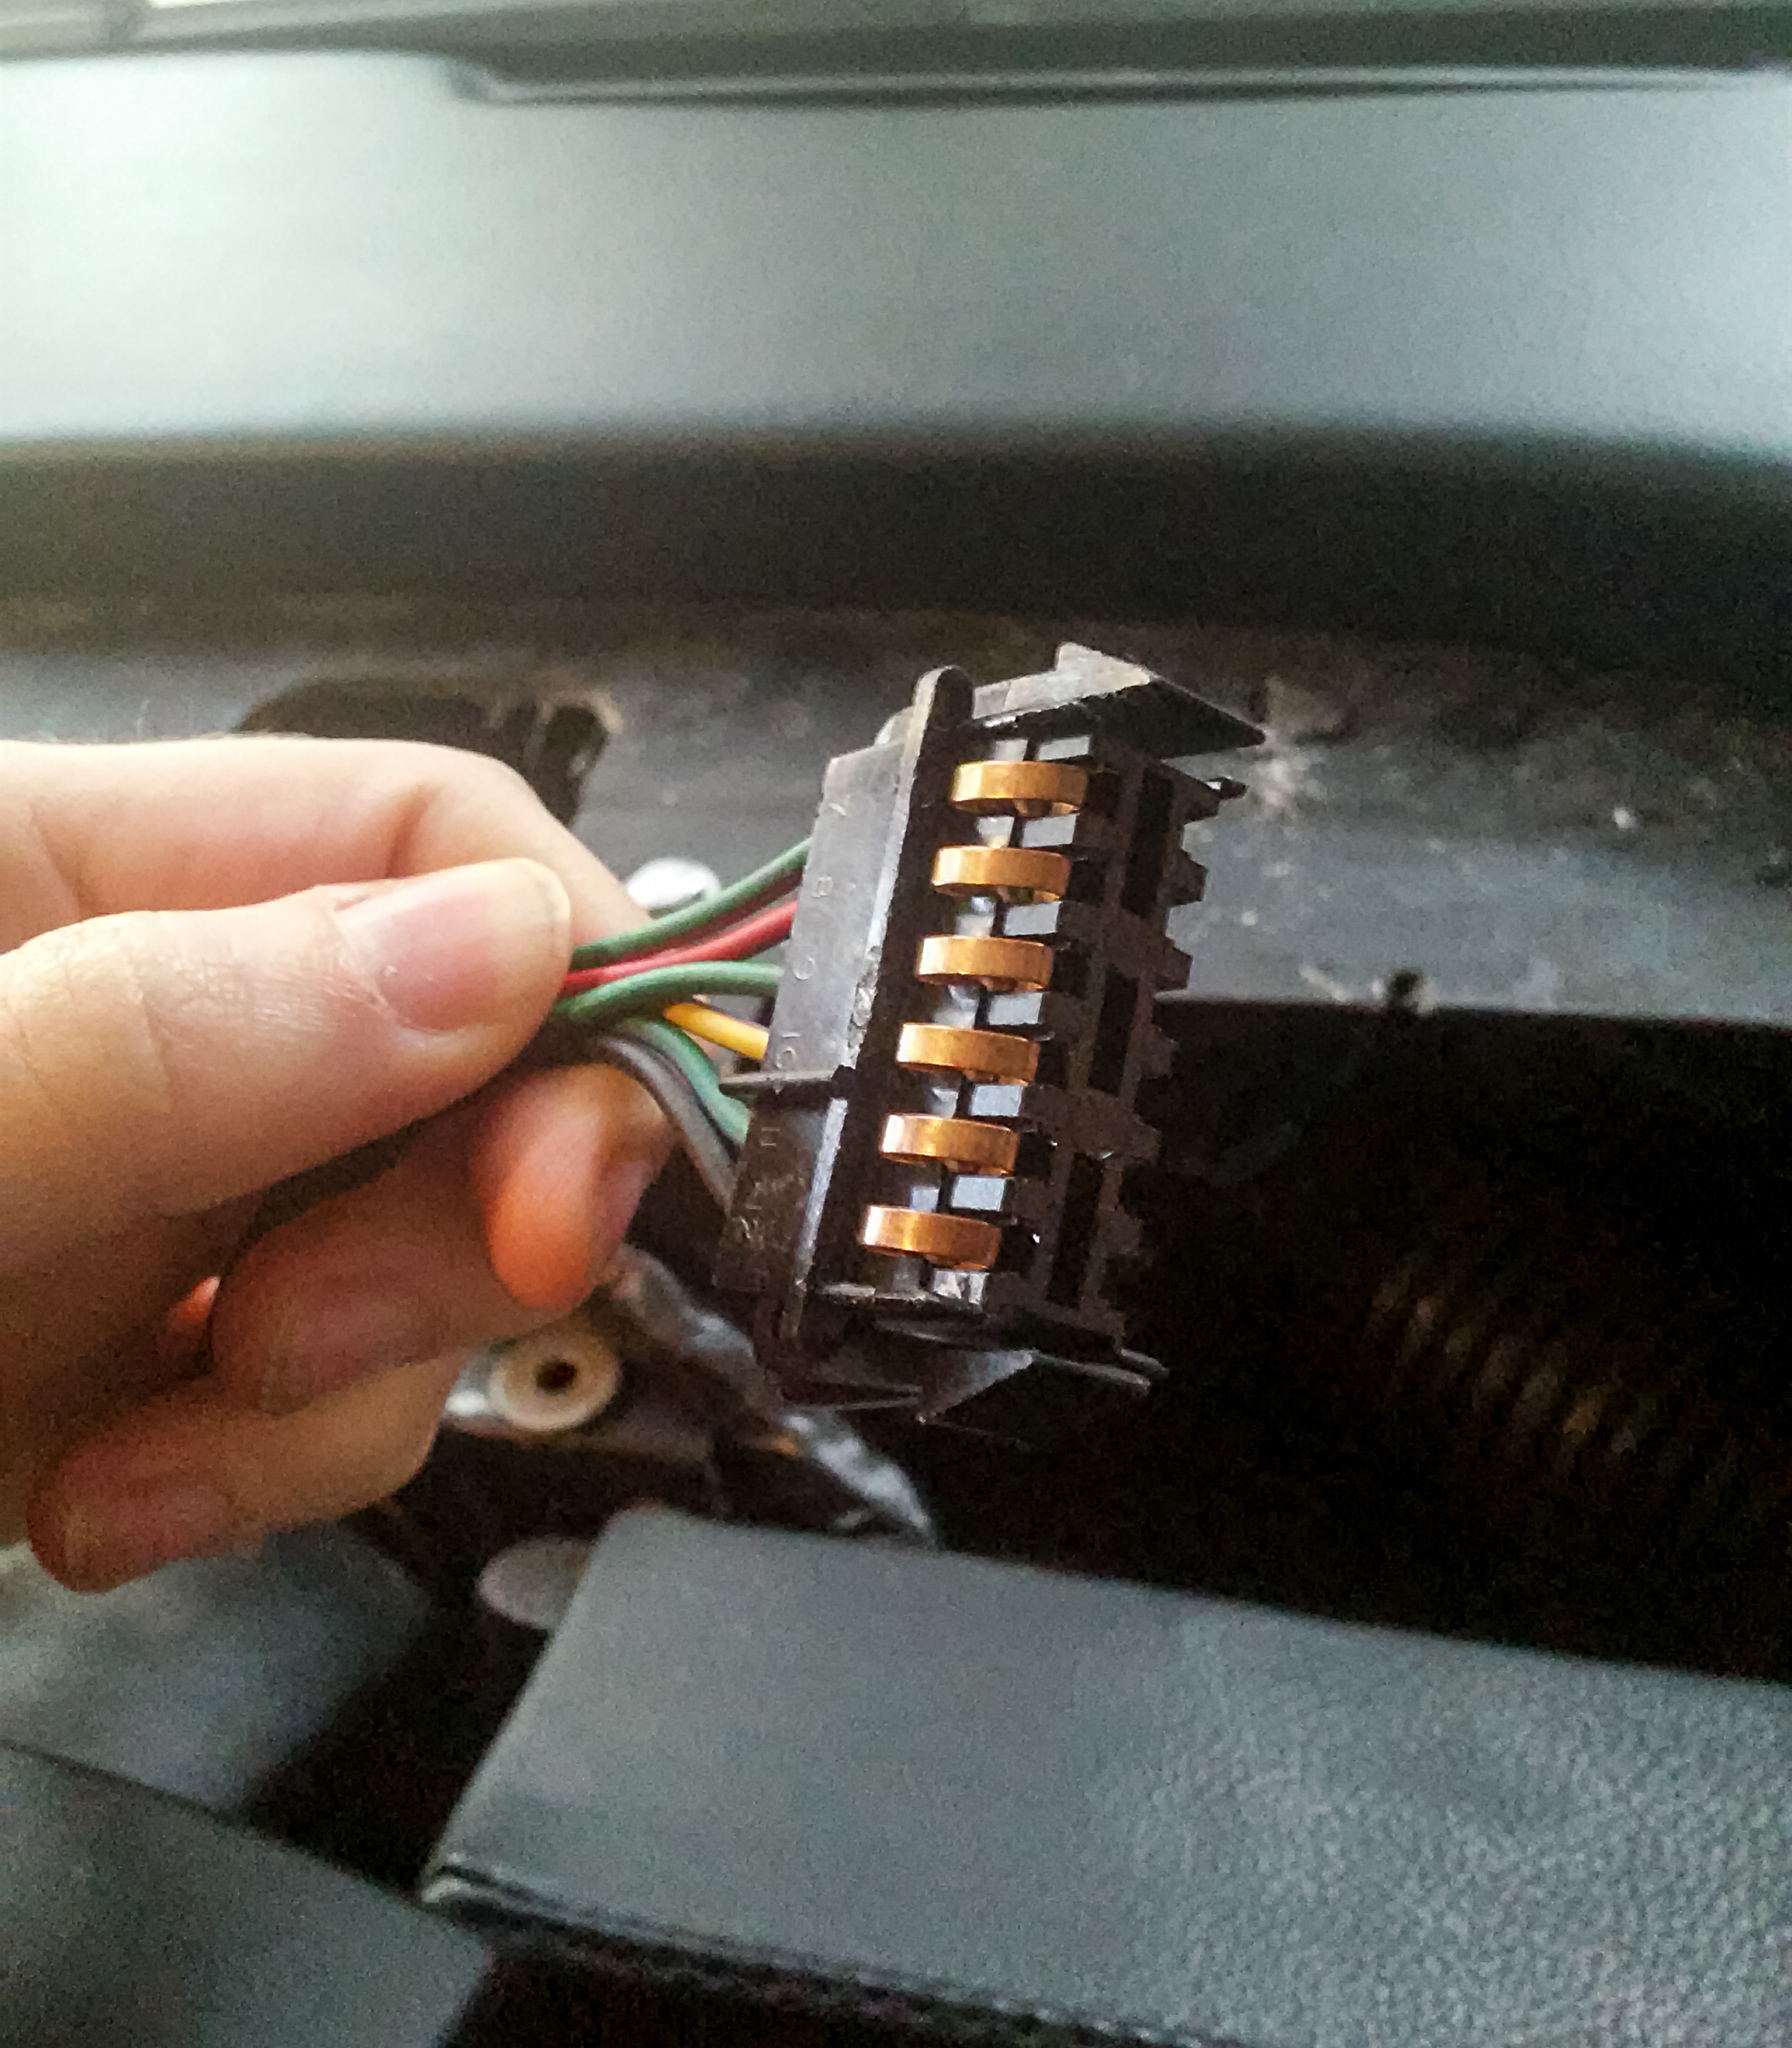
The secondary side connector to the back of the DeLorean dash instrument cluster. A source for these is listed in this post’s comments!!
Like this article?
Did you find this useful? Donate to my Ko-fi, comment below or drop me a line to say thanks! The more donations/encouragement I receive, the more likely I am to write more articles, guides & tools like this in the future.
Similar Posts

DeLorean Door Card Foam Replacement
My DeLorean‘s now 39 years old, which means it’s got a long list of “nice to haves” that aren’t critical but they either need some attention or outright replacing. One example is the foam in...
DeLorean in Queen St Mall, Brisbane for Blue World Order
In late 2017 my DeLorean was used for promoting the indie Aussie film Blue World Order. Produced by Matthew Reilly and directed by Ché Baker, it’s a post-apocalyptic science fiction film set in the Australian...
Those plugs, the 12 trace version is deffo Leyland/BL/Austin/Rover Mini, probably other things from that make too.
I suspect they’re probably Lucas patent.
These dashboard PCB connectors are used on 80’s and 90’s GM cars. My Buick (1990) has one on the dash PCB that looks exactly like it.
Classic Industries sells the connectors, but make sure you count the pins. There are different sized connectors.
It’s called a “Printed Circuit Board Connector.”
The Ron Francis PC-12 looks like the smaller one:
https://www.jegs.com/p/Ron-Francis-Wiring/Ron-Francis-GM-Printed-Circuit-Connectors/6350244/10002/-1
this may be the larger one:
https://www.classicindustries.com/product/bw900217.html